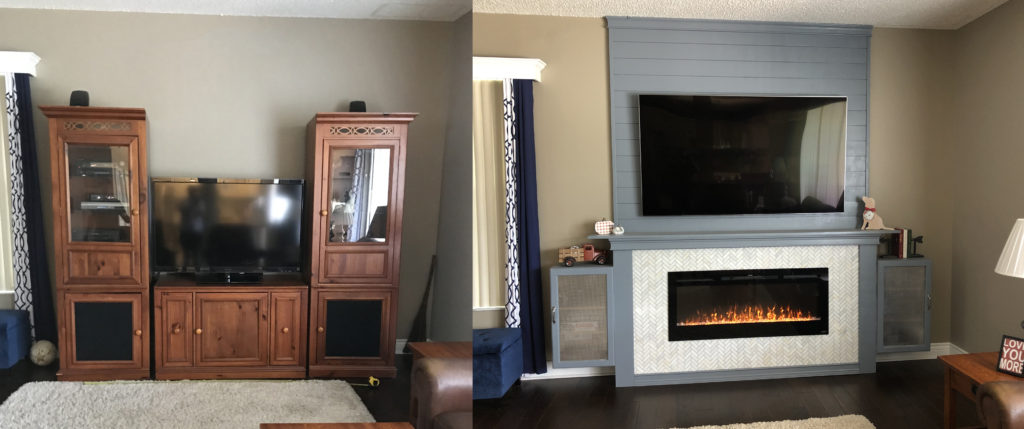
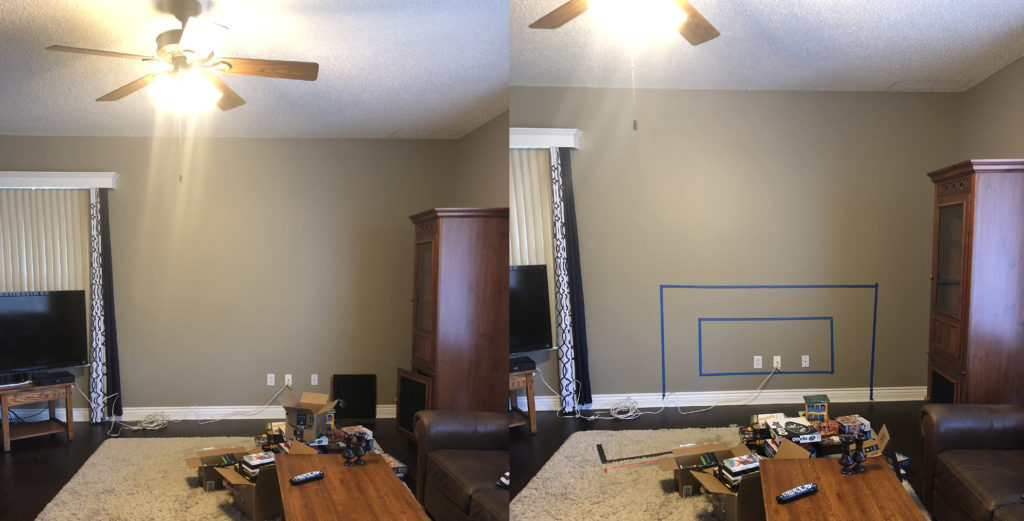
First: I cleared the area and we got to work laying out the fireplace and frame. We used painters tape so if we didn’t like any part of the layout we could easily pull it off and move it. We measured the wall and centered the fireplace between the wall to the right and the window to the left. All of our measurements came off of that center line. To fill up the space we ended up with the fireplace insert being about 13” above the floor and the frame about 14” on each side (part of this decision was based on getting one complete 12” tile around the insert rather than having a seam (see below). We could have made it larger but we wanted to leave space in case we added side cabinets (more on those later).
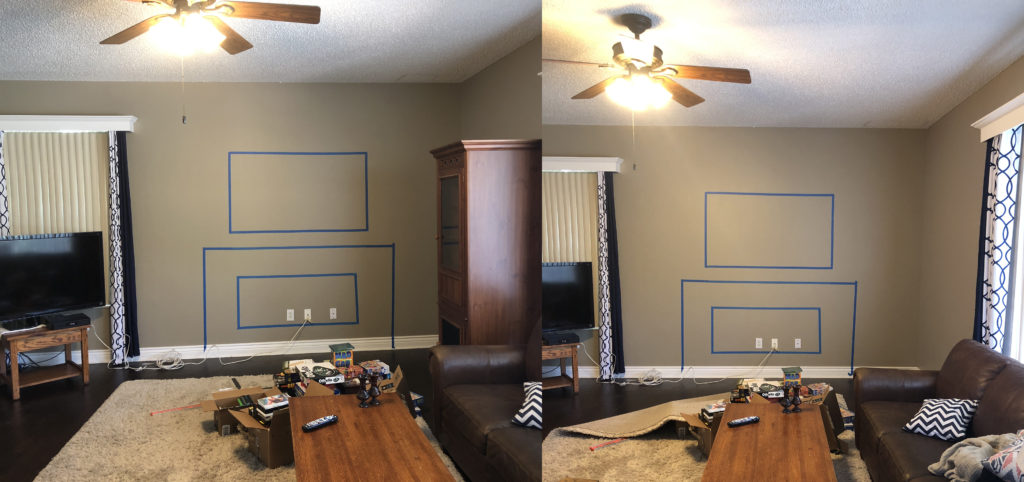
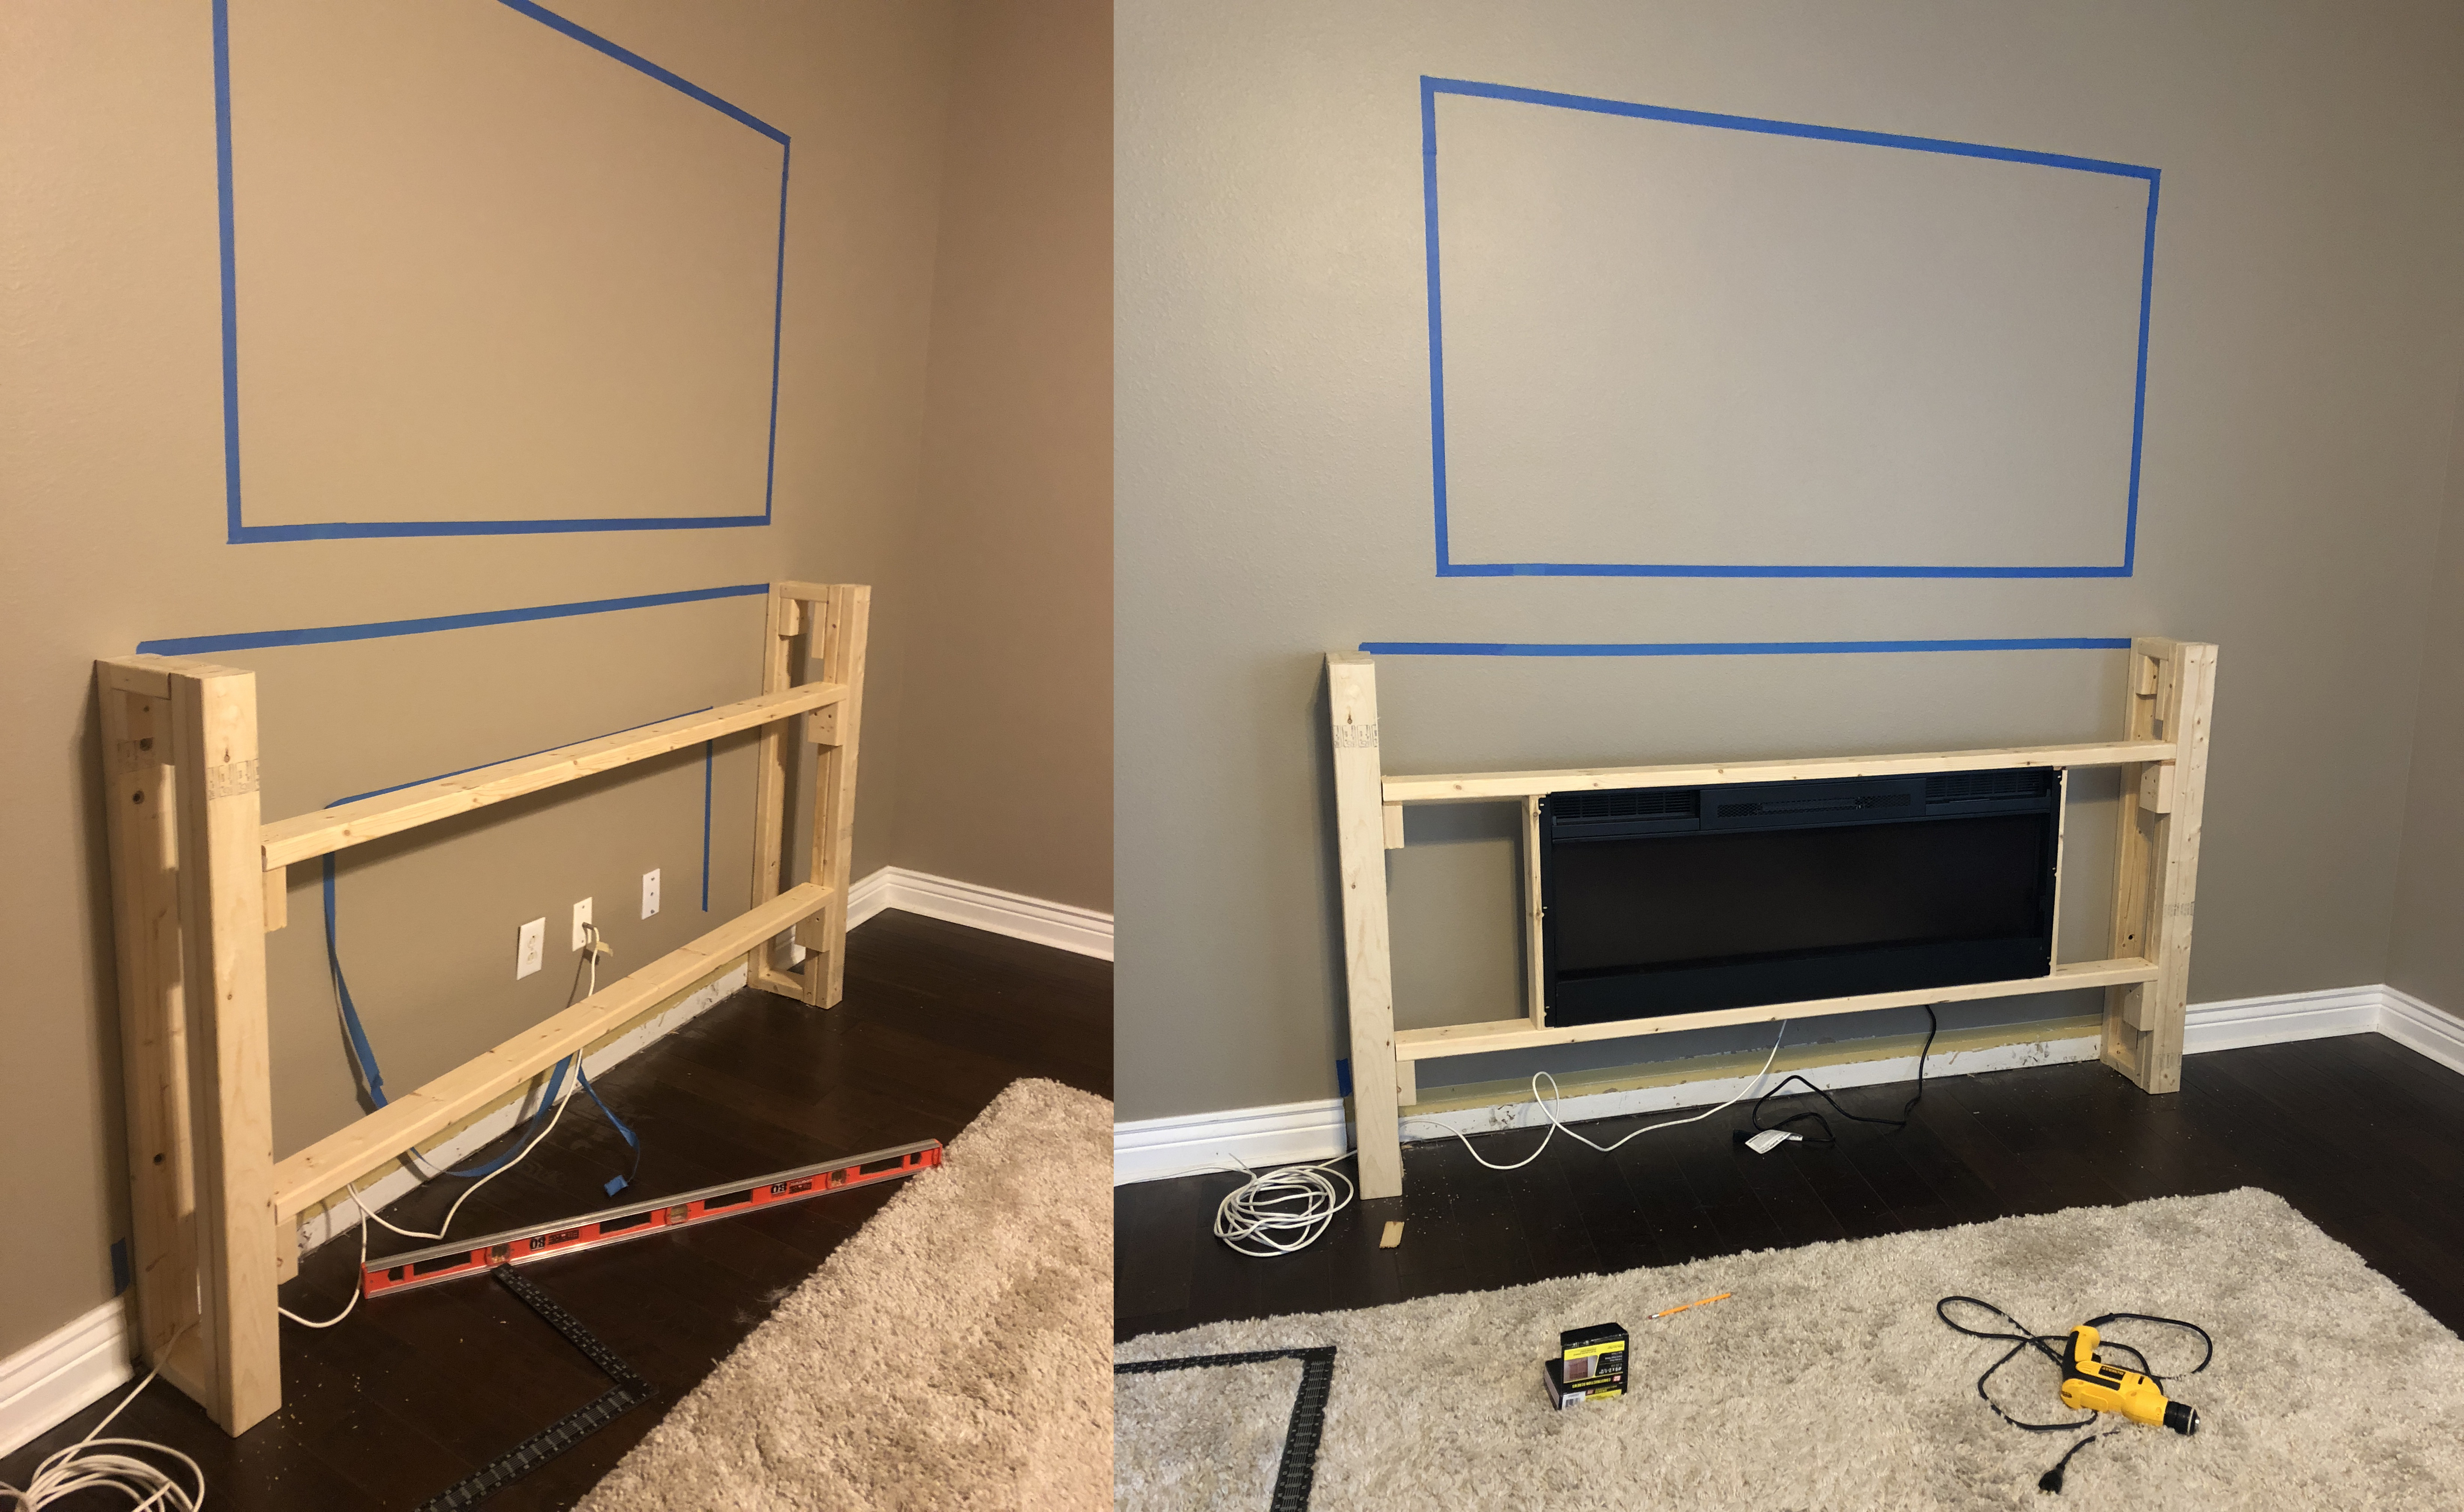
Next we laid out the lines for the TV and looked at it from every angle to make sure we liked the location. I read countless articles that debated the ideal viewing angle for a TV and in the end settled on centering ours about 70” off the floor. Your TV will vary but we wanted to make sure we could keep it as low as possible and still have room for the mantle insert without looking too crowded. The bottom of ours is around 52” off the floor.
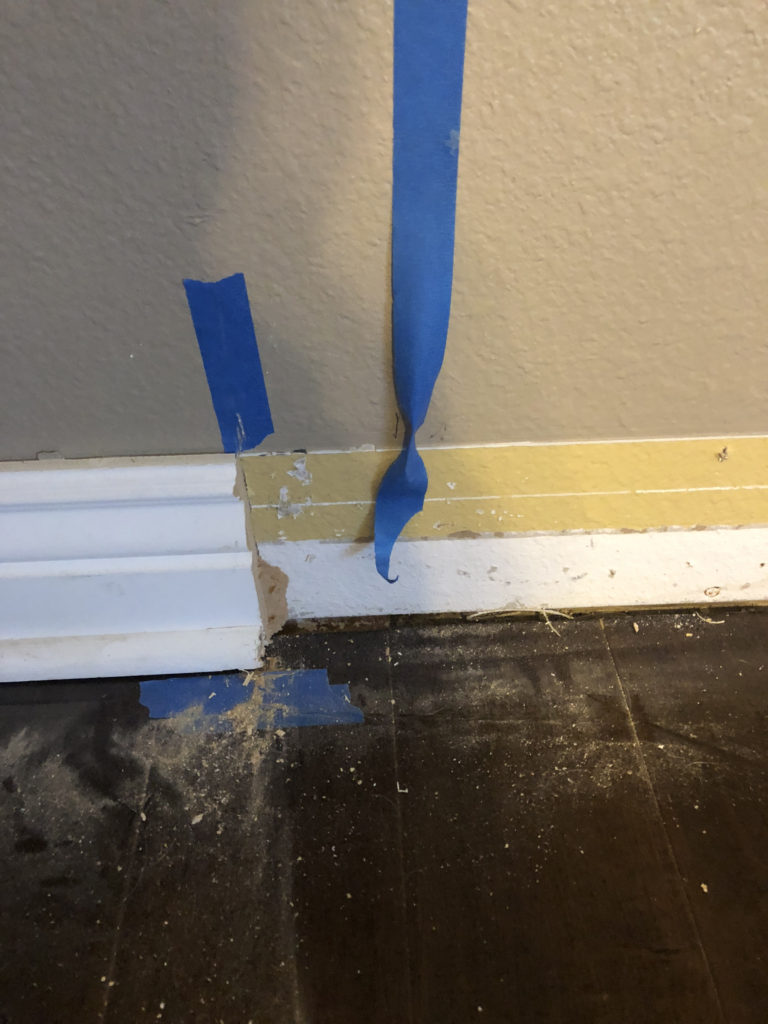
Now, time to get to work. The first thing we had to was cut the baseboard so that the fireplace would be flush to the wall. One option is to pull out the entire baseboard, cut it and then put it back. The problem with this is that very often the baseboard breaks. Even if it doesn’t putting it back, re-caulking and painting is a pain. So the best option was to use a dozuki saw to get a nice straight cut on the baseboard (See products used page to see some good examples). This is a Japanese saw that allows you to make precise cuts on the baseboard while it is in place. We marked the lines, made the cuts and then pulled out the section that would be behind the fireplace. (Before you get started make sure that all of your work is done to local codes including any framing or electrical requirements.)
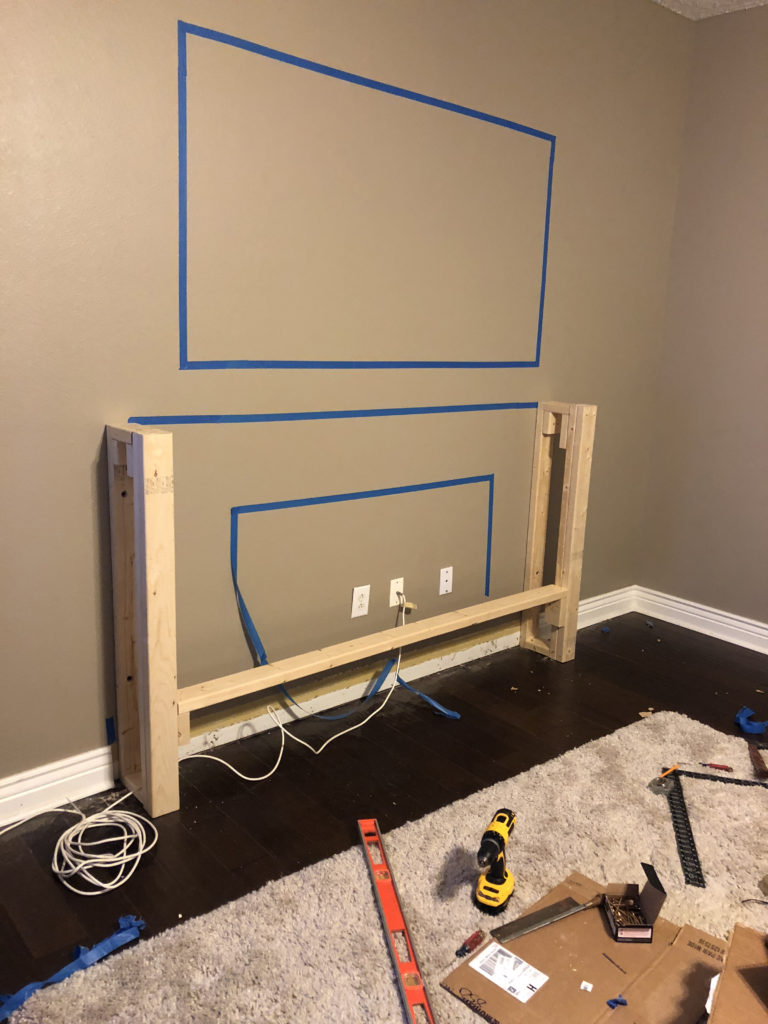
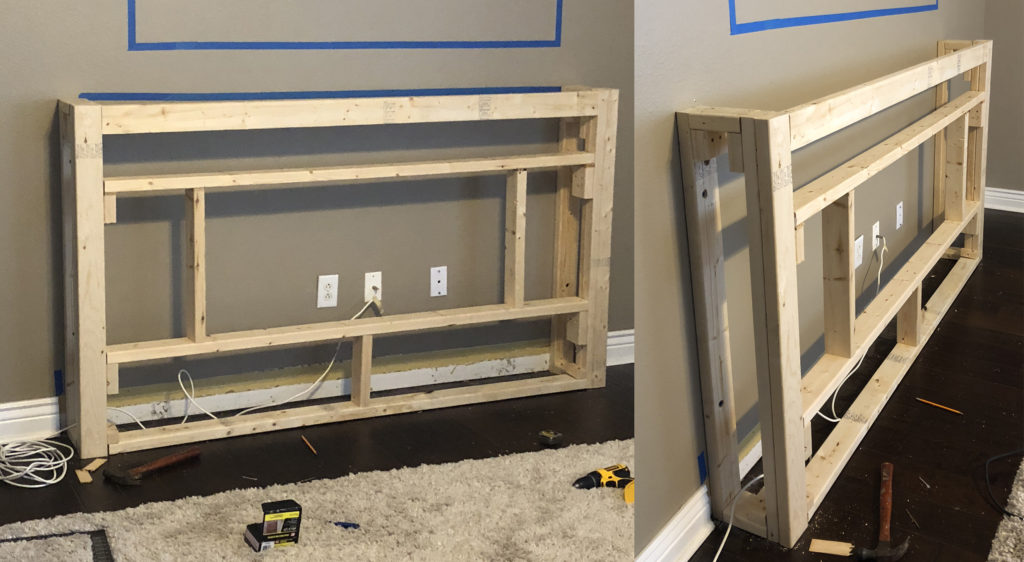
Next, I cut two by fours to the correct height and used lag bolts to secure them to the wall. We had block behind our drywall but if you have frame construction make sure you use a studfinder to secure the back posts or an attached cross post to the studs so your entire mantle is securely tied to the wall. We wanted our total distance away from the wall including the fireplace front to be around 12” so our 2 x 4 frame out came out to 10.75 inches away from the wall.
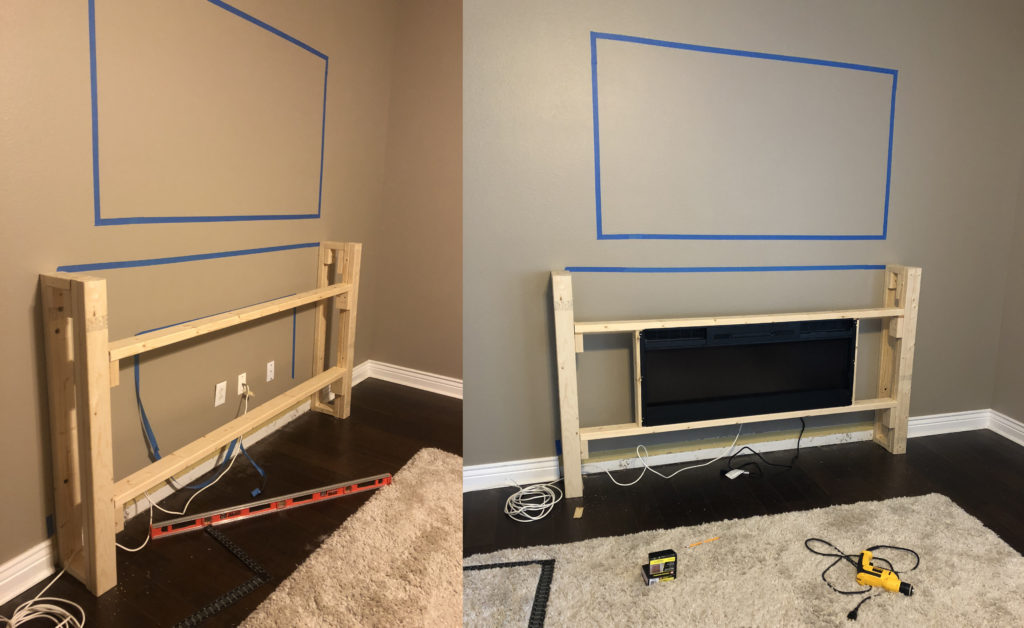
We added the top, bottom and side braces at the right distance based on the template that came with the fireplace. We tested the insert to make sure it fit will without too much or too little space.